Janet's Creations

Janet's Creations
Gemma's "I Spy" hexagon quilt

Friday, April 11, 2014

Recent Quilts Completed - Spring Fling, Disappearing Four Patch with a Twist, Variation on a Yellow Brick Road, and a classical 16 Patch with muslin background.

 I am calling this quilt Spring Fling - it is from my latest issue of American Patchwork and Quilting.  I subscribe to only one magazine and in order for me to justify the cost - I do make at least one project from each edition.  
I am still working on making a quilt for each month of the year to hang over my fireplace -  this is for the month of April or around Easter time. Some of the fabrics have Easter motifs and others and just spring tones.
I am going to stop putting sleeves on the wall quilts I make.  I bought clip on fancier cafĂ© style curtain hooks and hung this quilt using them and I liked the look and so much easier :)

The white on white background for this quilt was an online purchase from a seller at The Quilting Board.  It was advertised as white on white but when it arrived it was all about the great state of Texas - steer skulls, cowboy stuff, lassos, branding irons, etc.  Not what I expected but all cut up it worked out fine. This quilt has a polyester batting as there is so much with background and I didn't have a white cotton batting.


This pattern is called a Disappearing Four Patch with a Twist.  I had picked up this fabric online for $1.00 a yard. The lavender and sunflowers was in strips and a border style fabric and the green was a solid also for $1.00 a yard.
Here is the link for the pattern http://round22.blogspot.com/2012/07/disappearing-4-patch-with-twist.html  - it doesn't come up as a hyperlink but you can find it this way.  Her example is much nicer than mine.

This too, will hang over the fireplace for the month of June or become a baby girl quilt for a present. I will likely do this again with fabrics that had more definition but for $ 4.00 the quilt is not so bad.
I pieced together some cotton batting to make this quilt and I just zig zag the edges together, no fancy tape for me.
I have always wanted to do a Yellow Brick Road - but with no yellow :)  This quilt is for my step-daughter here in California who is likely moving to Atlanta with her beau in the summer.  I wanted them to have something special to start there new life together.  What could be better than a new super Queen size quilt.  I messed up cutting the fat quarters, but I am very pleased with how it turned out.  No one but me would truly ever find the oopsie.


Lastly, is the 16 patch with muslin background.  I made this for my g/f Clara.  She gave me a jelly roll and I found this pattern in a book by Pam and Nicky Lintott from across the pond. It is a variation on an antique quilt.
 click here to view larger image of Antique to Heirloom Jelly Roll Quilts (BOOKS)

Clara will give this as her charity quilt for the guild later on this year.  I love the look of muslin in quilts!  I buy it by the bolt at Joann's with a 50% off coupon, nothing too expensive and it seems to work just fine in quilts.


Yippee, I have arrived - truly first paid commission - Moons in the Windows.


 For the Moons in the Window quilt - I used batiks in the blue and orange-yellow families for that part of the quilt and a nice background.  I added another row (not on the pattern) to the bottom and top row,  and added a solid matching border to all sides to make it bigger. The original pattern called for a 61 inch square and I wanted a rectangle.

Alva wanted to use polyester batting and I used Hobbs.  Everything quilted up really nice using Superior's clear thread on top and their Bottom Line on the backside.  I haven't gotten passed  meandering and I am glad that everyone likes that for their quilts.


Needless to say, Alva was elated with her custom made quilt.  I also received a substantial tip which was super!

It was really nice to be paid for doing something that I love to do.  The money I earned was my Spring Break spending money as I went to visit my daughter in Redmond, WA and my other daughter from Edmonton, Alberta, Canada flew down to see us all and my sister from out by Mount Baker, WA came in too.  It was so nice to have my family together :)

Monday, January 6, 2014

Glowing Pineapple Quilt As You Go (QAYG) Original Pattern from Sylvia Q. Davis - AAQLA Quilt Show Demonstration 2013

I take no credit for this pattern, and have cited in the title
 the woman from whom I received the pattern.
There that should take care of that business :)
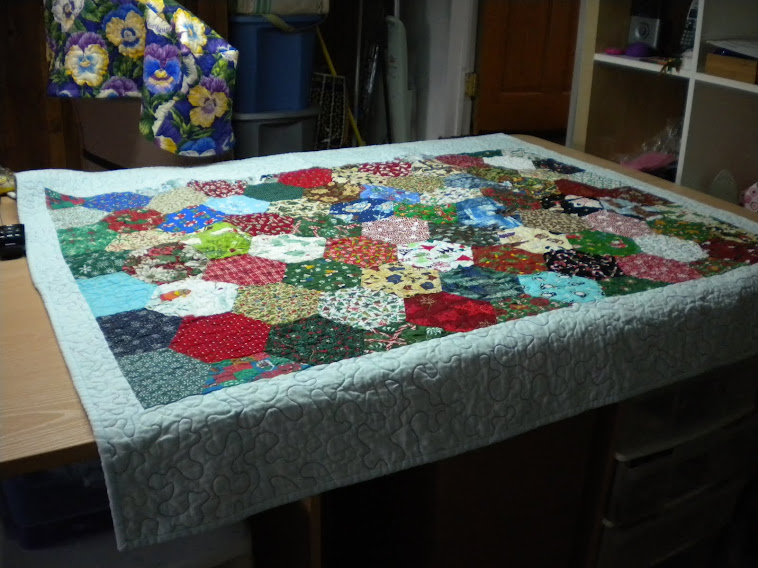
I did not follow the number of fabrics that she used - I used a multicolored dark blue, swirly pale blue-green and teal.
When I ran out of the multicolored blue -  I switched to purple as I wanted a large quilt (can't see doing little quilts when most everyone's beds are bigger these days.)

 The above quilt is 10 x 11 blocks for a quilt measuring 105 x 115 inches roughly


The purple fabric came into play when I didn't have enough
of the multicolored blue and 

I had already committed to the larger quilt.

 It calls for a busy backing and I chose this one.


Tutorial :)

Materials:  This is a rough estimate as I didn't think I would be doing a tutorial

Fabric A - multicolored blue - 5 yards (remember I had to swap in the purple to complete the quilt) I would buy 8 yards if I was doing it again.

Fabric B - blue green swirly 4 yards - it was an older McKenna Ryan that I got out of a discount bin. I would get 5 yards if I was going to do it again.

Fabric C - teal it came out of my stash and I am guessing maybe 2.5 or 3 yards.

Backing - I had 10 yards and used just about all of it up.

Batting - A king size very FLAT batting - I used the cut off ends from other quilts that I had made.  Warm and Natural or any 80/20 batting would be suitable.

Sashing - I used black on the front (2 inch strips) and lime green on the back (1.5 inch strips.)  I really like the solid colors from Connecting Threads and bought 5 yards of each and have left overs - likely I used under 3 yards of each color. I used the lime green for a 2.5 binding

Prep work:  Get ready to start cutting

From fabric A cut the following:
3.5 inch square - 110
5 inch square - 110

From fabric B cut the following
3.5 inch square - 110
6 1/4th inch square - 110

From fabric C cut the following
4 1/8th inch square - 110
8 inch square - 110

Backing cut 11 inch square - 110

Batting cut 11 inch square - 110

Draw an X on the back of all squares except the largest 11 inch backing square and the smallest 3.5 inch center square.  Make a small snip in the center exactly on the line.

Draw an X and a cross on the batting squares.
Place a batting 11 inch square on the wrong side of a backing 11 inch square

See examples below for placement of X's and crosses


I used a children's washable felt marker to draw the X and then the cross on the batting squares.
You want the color to wash out, especially if you use a light color center square.


This is what it will look like once it has been sewn all around the edges. I want you to see the placement of the squares, so I put it first.

1. Place a 3.5" A square right side up on the batting. Place it "square" (the tips of the center   square touch the diagonal lines.)
- Place the 3.5 " B square right side down matching the center square. Be sure all points touch the  diagonal lines.
- Stitch around the square 1/4" from the edge. Pivot at the drawn line and do not leave an opening.
- Cut only the top square exactly on the diagonal lines completely to the corners.
- Flip the triangles points out and finger press.  The tips should touch the X lines drawn on the batting.
  

It should look like this when you are done :)

Below is showing how to snip the center so you can easily cut the X on your top fabric after sewing around the edges.


2. Lay a 4 1/8th C square on top of the square on the batting - lining up the X on the fabric with the X on the batting.                                                                                                                                                                                 
Stitch around the square 1/4" from the edge.


Cut only the top square exactly on the diagonal lines right into the corner as far as you can snip                                         

Open the cut fabric to form the triangles.                                                                                                                                                                                                                                                 

3. Place an A 5 " square on top of the open square on the batting as pictured below. Stitch, cut and flip again.
4. Place a B  6 1/4 " square on the
 previous square as follows and
 stitch, cut and flip.


5. Place a C 8" square on the
previous square as follows 
and Stitch, cut and flip.
You are done the block!!!!
It should look something like this - great job now on to the rest of your blocks :)   
Finishing:

  • Square up all the blocks to the same size 10" is good (I tried 10.5 and ran into some trouble I don't want you to have those worries) if you can square to 10.25 go for it - I can't do 1/4 inches.  Remember all the points are blunted - maybe some a bit more than others but all it good.
  • I used You Tube to learn how to do the joining of the blocks. Here is the link  - she does a bang up job of teaching the method I used so why re-invent the wheel.
  • http://www.youtube.com/watch?v=ji8BLS2rNHA                                                                                                      
 Lastly, I am included Sylvia's copy of the pattern it has drawings on it that I haven't a clue how to add to this :)  Questions? Email me and I will try and help you out, okay?  Thanks for looking and good luck with all your quilting adventures!